

Add Your Own Custom Logo To A Drafting Sheet in Solidworks

A step by step guide on how to get great results when creating and inserting a custom logo design into a drafting boarder in solid works.
This process can be a minefield full of issues.
I find that this is the best method so that you won't have any problems inserting pictures or logos disappearing when saving on to DWG,DXF or PDF formats.
-
Step 1: Model Your Logo

Text can be easily created in the sketch tool with many fonts to choose from play around with the options available uncheck the use document font at the bottom and the font option will activate.
Here I have sketched an arc for the word Company to follow select the curves box then your geometry for the text to follow have some fun try using any of the sketch tools for this.

Extrude and add some colour .
Go into the Solid bodies folder at the top of the feature tree to add separate appearances to multibody parts with a right click.
-
Step 2: Create A Jpeg Of Your Design

Open up the Photo view 360 function found in the solid works add-ins tab this will activate the render tools tab.

Select the preview window function.
You do get the more options and functionality with a full render or using visualise but this dose the trick.

This will open up PhotoView 360 program you may have to go back to your model to get the positioning right or set up a camera position when photoview 360 will give you the option when opening.
wait until the render reaches 100% then select save the preview image save as a JPEG.
I always create a few different shots .


Top tip : These Jpegs can be adjusted and cropped in windows photo viewer before they go onto a drafting sheet.
-
Step 3: Inserting JPEG To Drafting Sheet
Open up a drafting sheet as normal file-new-drawing-ok
At this point its worth opening the browse option to find the file location for the your drafting sheet templates.
 Top Tip : Add this file location to your quick access or favourites a quick drag and drop dose the trick.
These file locations can be tricky to find when you come to save your finished sheet template I also use this for weldment profiles .

now go back and open the size sheet you want.
Then right click on the sheet and go into edit sheet format.

Next select Insert then in the drop down object.

In the pop up menu check the create from new option and select the paint brush picture in the drop down menu then ok.

Then the paint program will open, simply open the JPG of your chosen design in windows viewer then copy & paste in.

Close the paint window.
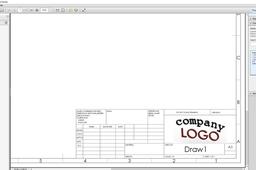
Your design now will appear on your drafting sheet .
now resize and place your logo design using drag points around the logo the .

Exit the edit sheet format.
-
Step 4: Save Drafting Sheet
To save a template so it will appear with all of your standard drafting sheets you need to use the save sheet format in the file menu .
 Rename your sheet make sure it is saving as a slddrt file.
This Drafting sheet will now be available when you create a new drawing by unchecking Only show standard formats or using the browse option.
 Your custom logo design will now stay with your drafting sheets when saving on into DWG,DXF and PDF formats.

Top Tip: if your Logo looks unclear and pixilated after printing or saving as a PDF go to the export options in the save as menu it will appear after you select the PDF file type .
You need to change the shaded draft geometry DPI to 300.

Please feel free to like , share and comment .

