

Fusion 360 - How to use the three types of Extrudes

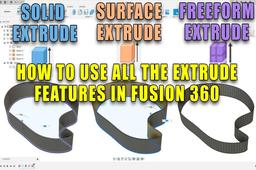
Fusion 360 offers three main Extrude functionalities for creating 3D shapes: Solid Extrude, Surface Extrude, and Freeform (T-Spline) Extrude. Each caters to different needs in your modeling process.
-
Step 1: The difference between extrudes
1. Solid Extrude:
This is the most common type of Extrude, used to create solid objects with thickness. Here's a general workflow:
Sketch a closed profile (like a rectangle, circle, or any complex shape with a clear boundary).
Select the "Extrude" command (Create - Extrude).
Choose a direction and distance for the extrusion (think of pushing the profile out in space).
Optionally, define the number of faces for a smoother surface or adjust end conditions.
Solid Extrudes are great for creating basic 3D objects like boxes, wedges, or custom designed parts.
2. Surface Extrude:
This approach creates a thin shell or surface along a profile. The workflow is similar to Solid Extrude:
Sketch a closed profile.
Select "Extrude" but choose "Surface" instead.
Define the extrusion direction and distance.
Surface Extrudes are useful for designing sheet metal parts, cladding, or creating surfaces for further manipulation.
3. Freeform (T-Spline) Extrude:
This is unique to Fusion 360 and offers more organic sculpting capabilities. T-Splines allow for smooth, editable extrusions. Here's a basic guide:
There are multiple ways to initiate a T-Spline model: using existing primitives, creating a single face, or using sketches.
Select "Extrude" and choose "T-Spline body."
Define the extrusion direction and distance like before.
T-Splines offer greater control over the extruded shape. You can manipulate the profile itself, add or remove faces for detail, and use push/pull tools for organic sculpting.
