

How to create a car surfaces based on BMW X6?

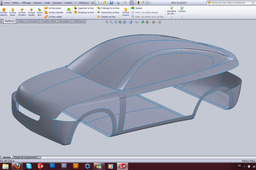
you will see some of the advanced method for creating surfaces of a car BMW X6
-
Step 1:
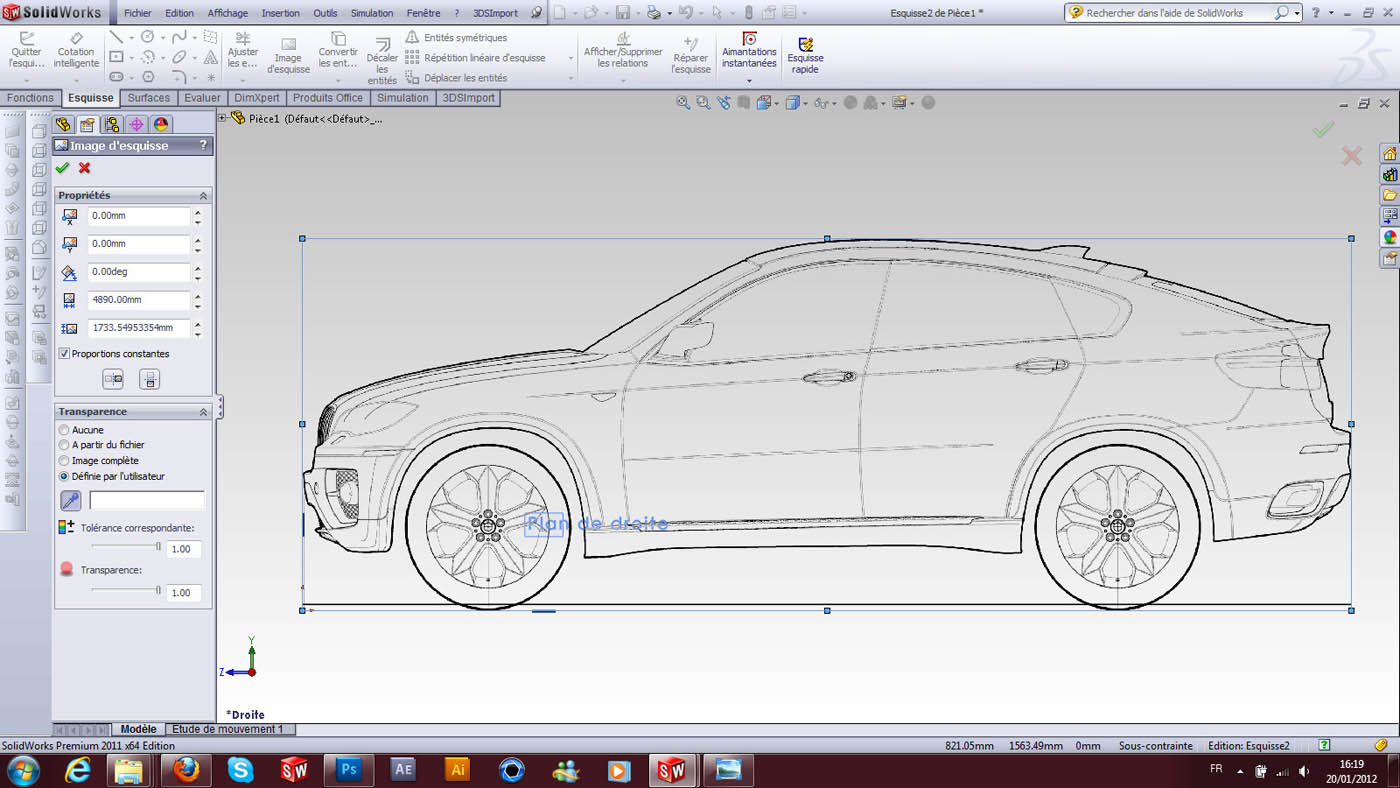
1 - open a new file and choose the right plan and click on sketch image

-
Step 2:
2 - but we must prepare images before, we choose the image

-
Step 3:
3 - we put on the transparent image by clicking on the color of the image bleached by the pipette is left to bottom
-
Step 4:
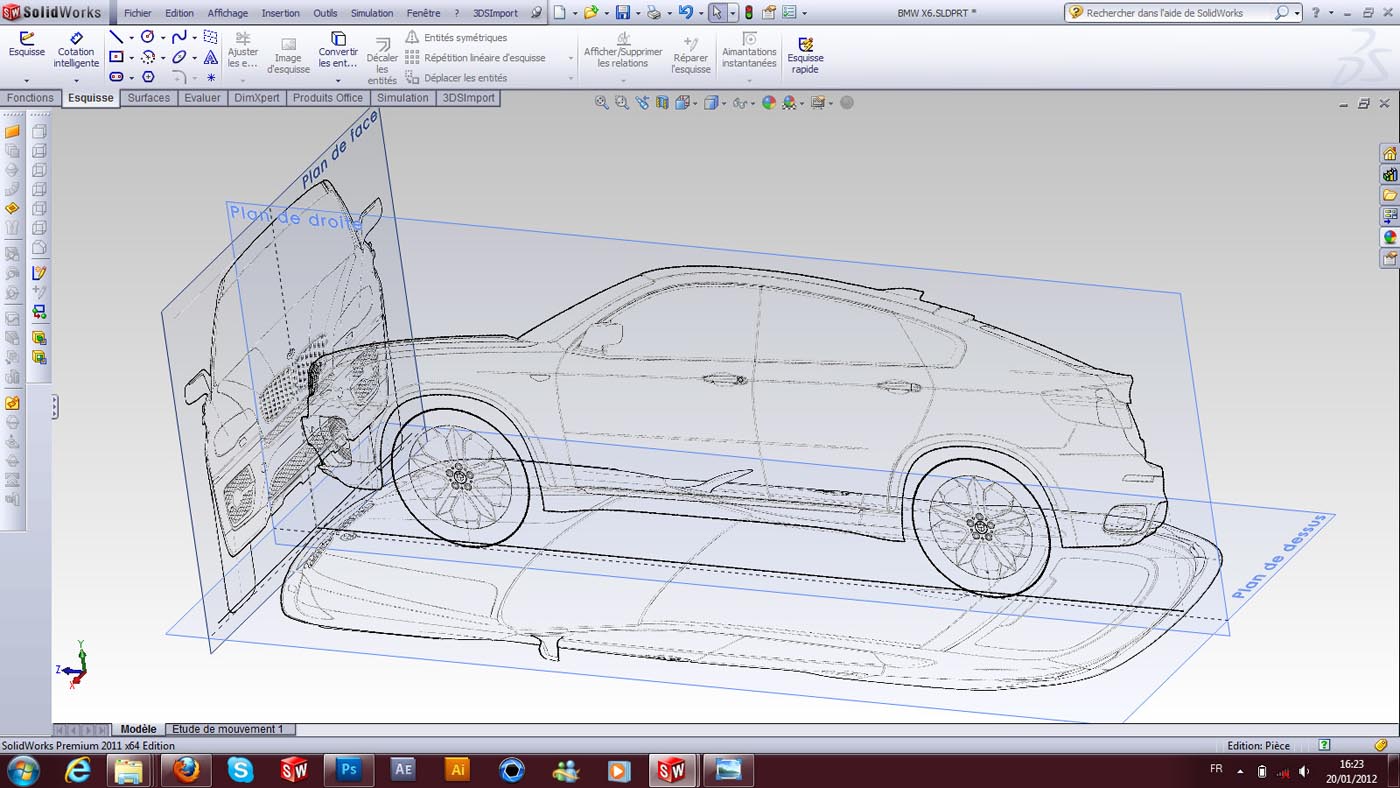
4 - and we do the same steps for other pictures

-
Step 5:
5 - .
-
Step 6:
6 - and to plan the back by creating a parallel range plan to plan ahead

-
Step 7:
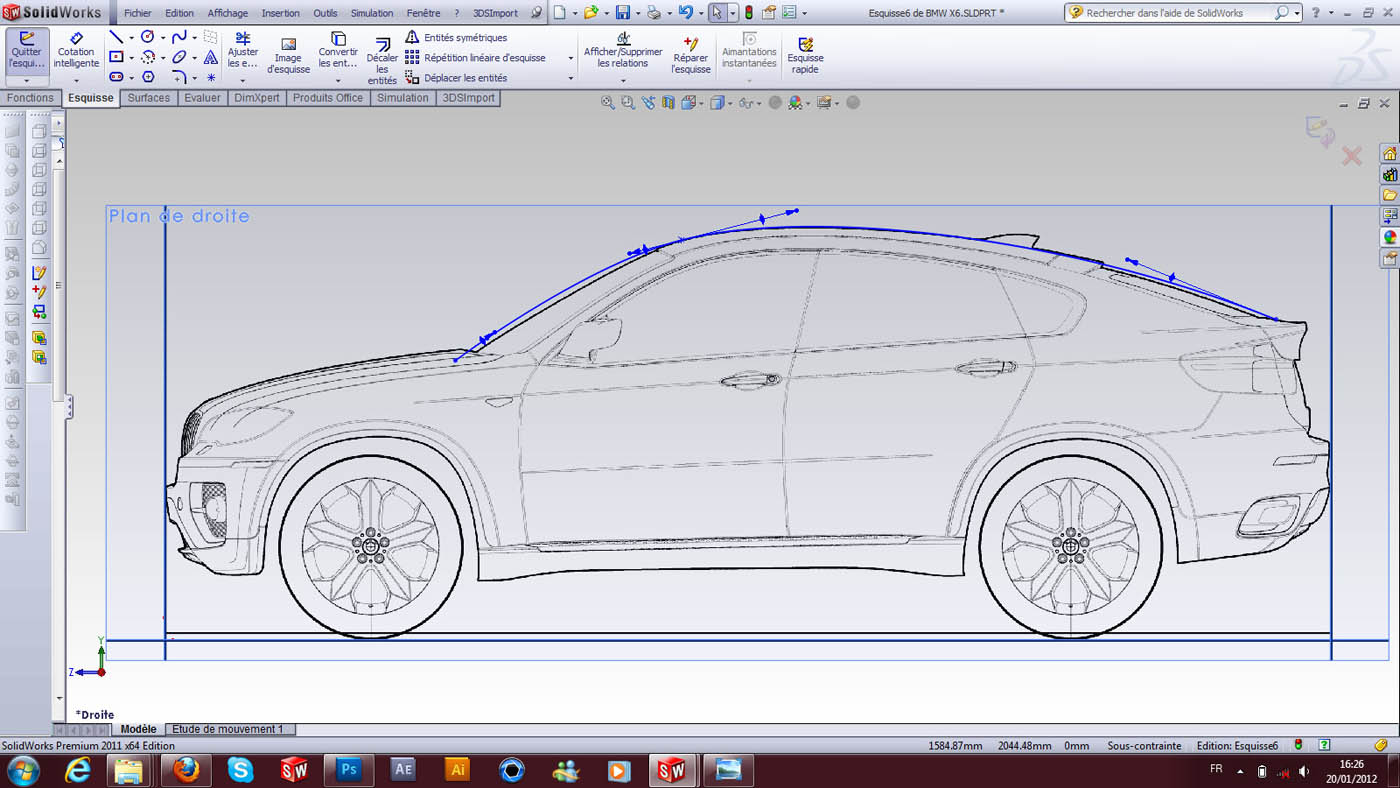
7 - After I draw a spline on the image to the right plan
-
Step 8:
8 - and extruding the spline

-
Step 9:
9 - drawing a sketch on the plane below and we put two lines of construction until the mid plane

-
Step 10:
10 - and the same operation on the right plan

-
Step 11:
11 - after we make a projection for the two curves

-
Step 12:
12 - After you connect the surface created with the projected line

-
Step 13:
13 - we create another line near the first projection

-
Step 14:
14 - Another projection curve

-
Step 15:
15 - After you connect the two spline curve by a closed 3D sketch

-
Step 16:
16 - and we perform the sketch

-
Step 17:
17 - After we create a sketch on the plane as in the picture below

-
Step 18:
18 - and we restrict the part we do not need

-
Step 19:
19 - the same goes for the rear side of

-
Step 20:
20 - We connect the two surfaces with a 3D spline

-
Step 21:
21 - we create a boundary surface as in the picture

-
Step 22:
22 - we hide the first area created

-
Step 23:
23 - we can create the symmetry

-
Step 24:
24 - and we note that the surfaces created are well established in terms

-
Step 25:
25

-
Step 26:
26

-
Step 27:
27

-
Step 28:
28

-
Step 29:
29 -

-
Step 30:
30 -

-
Step 31:
31 - We connect the surface created with the projected curve

-
Step 32:
32 -

-
Step 33:
33 - you will find the model with other steps in http://grabcad.com/library/how-to-create-some-surfaces-of-a-car-bmw-x6

