

How to trace a picture or image in catia and converting it into surface or solid

IF ANY DOUBTS FEEL FREE TO ASK ME. DOUBTS ARE WELCOMED
-
Step 1:
Open the Catia from the Catia icon

-
Step 2:
Now Go to Start-> Infrastructure -> Real Time Rendering

-
Step 3:
The Real Time Rendering Workbench looks like this

-
Step 4:
Go to -> Insert -> Part

-
Step 5:
Select The Product on the Left Top Corner of the Workbench to insert the part into it

-
Step 6:
The required part is created in the Product as below

-
Step 7:
Expand the Part on the Left Top Corner and Double click on the part to enter into part design workbench

-
Step 8:
Then Go to Start -> Shape -> Generative Shape Design

-
Step 9:
Then select a Plane required to you and click on the sketch tool to enter into the sketch of the required plane

-
Step 10:
Draw a line or curve according to your requirement in the sketcher

-
Step 11:
Exit from the Workbench to enter into the Part design workbench

-
Step 12:
Now click on the extrude tool to extrude the given curve or line to become a surface

-
Step 13:
There opens a window of extrude, then select the profile and give required the dimensions

-
Step 14:
Extend it to your requirement for your image or picture as below

-
Step 15:
After extending it select the plane so as to get the correct orientation.

-
Step 16:
The required surface looks like this.
And the change the ViewMode to Shading with Material

-
Step 17:
Now Double Click on the Product on the left top corner to enter into the Real Time Rendering Workbench

-
Step 18:
After double clicking on it. It appears like below

-
Step 19:
Now click on the Apply Sticker on the Apply material Tab as below

-
Step 20:
Sticker window appears as below

-
Step 21:
Now click on the browse button which is in four colors on the Image line horizontally on the sticker window and select the picture to which you want to trace and click on open

-
Step 22:
Now click on the Selection on the Sticker window and click on the surface on to which the image has to be projected as below

-
Step 23:
The image is projected on the surface and set the image to required scaling and required position for your convienence

-
Step 24:
Click on Ok on Sticker window

-
Step 25:
The Picture or image looks like below

-
Step 26:
Now double click on the Part in the Product tree to enter into a part design workbench

-
Step 27:
After entering into the surface with sticker looks like this

-
Step 28:
Now click on the sketch tool

-
Step 29:
Now select the plane on to which the sketch has to be drawn

-
Step 30:
After entering into the sketcher, it looks like this

-
Step 31:
Now zoom it to your required for tracing the picture or image

-
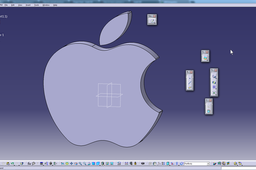
Step 32:
Select the spline from the Profile tool Bar and draw the splines on the outline of the picture. And make sure that the continuous single spline cannot make the full required outline sketch. So use more than one spline

-
Step 33:
Now the trim the unnecessary splines to get the required outline. If required use the fillets and chamfers on the sketch

-
Step 34:
Now exit from the workbench by clicking on Exit Workbench tool

-
Step 35:
Hide the surface if you want to hide it by right clicking on it and selecting Hide/show

-
Step 36:
Looks like this if the surface is hidden

-
Step 37:
Now hide the sticker so as to see only your profile. To hide the sticker, right click on the sticker which is in the tree

-
Step 38:
Now if you want to make the traced profile to be a surface make it fill, it you want it to a solid, go to partdesign workbench and then pad it

-
Step 39:
By clicking on the pad in part design workbench and select the profile which you have traced and give the length upto which you wanted

-
Step 40:
The required Part is created according to your requirement

-
Step 41:
Click It worked if you love the tutorial and helpful for you.
