

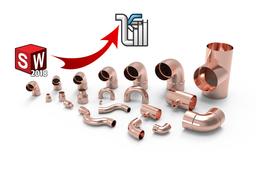
Introduction of copper pipeline elements to the base Routing Library

Configured base of refrigeration copper pipes and fittings (metric)
Introduction of copper pipeline elements to the base Routing Library
Внесение элементов медного трубопровода в базу Routing Library
-
Step 1: Language change/Изменение языка
For stable operation when adding elements to the Solidworks Routing module, it is MANDATORY that you need to translate your operating system into English (USА), since Most localizations have problems reading formulas in other languages.
Control panel =>Region

Для стабильной работы при добавлении элементов в модуль Solidworks Routing ОБЯЗАТЕЛЬНО необходимо перевести Вашу операционную систему на английский язык (США), т.к. в большинстве локализация имеются проблемы с чтением формул на других языках.
Панель управления => Региональные стандарты

-
Step 2: Add pipe/Добавление трубы
1. Open the pipe file [Copper tubes ITE DIN EN 12735-1] in Solidworks
Открываем файл трубы [Copper tubes ITE DIN EN 12735-1] в SolidWorks
2. We start Routing Library Manager / Запускаем Routing Library Manager
3. Choose Routing Component Wizard / Выбираем Routing Component Wizard

4. The new window provides a choice of type of route. Since This database has already been tested and configured, the program will determine that this file belongs to the piping section. Click "Next"
В новом окне предоставляется выбор типа маршрута. Т.к. данная база уже проверена и настроена, программа сама определит, что данный файл принадлежит к разделу Piping . Нажимаем "Next"

5. The next window prompts you to select the type of component. In this database, all elements are already defined in their categories. Click "Next"
В следующем окне предлагается выбрать тип компонента. В данной базе, все элементы уже определены по своим категориям. Нажмите "Next"

6. In this window, click "Next"/В данном окне нажимаем "Next"

7. In this window, the program checks the correctness of the names of sketches and sizes. All comments should be green. Click "Next"
В данном окне программа сверяет правильность наименования эскизов и размеров. Все комментарии должны быть зелёным цветом. Нажимаем "Next"

8. In this window, click "Next"/В данном окне нажимаем "Next"

9. In this window, the program checks the data in the parameter table of the part file.
[Attention! In some models from this database, unused (red) values will be present in this field. The need to fill them depends only on your needs, but at the same time all models are workable. Before putting them on GrabCad, all were checked individually.]
Click "next".
В данном окне программа сверяет наличие данных в таблице параметров файла детали.
[Внимание! В некоторых моделях из данной базы в этом поле будут присутствовать неиспользуемые (красные) значения. Необходимость в их заполнении зависит только от Ваших потребностей, но при этом все модели работоспособны. Перед выкладыванием их на GrabCad все были проверены в отдельности.]
Нажимаем "Next".

10. This window shows the data that is entered in the parameters of each configuration. Click "Next"
В данном окне показаны данные, которые внесены в параметры каждой конфигурации. Нажимаем "Next"

11. Save file to disk.
1. File name in explorer
2. Location. The file must be saved in the current Routing Library directory!
Click "Finish"
Сохранение файла на диске.
1. Название файла в проводнике
2. Место сохранения. Файл должен быть сохранен в директории действующей Routing Library!
Нажимаем "Finish"

The location of the existing library can be checked by clicking on the tab "Routing File Locations and Settings"
Месторасположение действующей библиотеки можно проверить перейдя на вкладку "Routing File Locations and Settings"

12. In the pop-up window, confirm the save. After saving, a window will appear asking you to add a component to the "Piping & Tubing database", and confirm.
В всплывающем окне подтверждаем сохранение. После сохранения появится окно с запросом о добавлении компонента в базу "Piping & Tubing database", так же подтверждаем.


-
Step 3: Adding Taps/Добавление отводов
1.Open the file elbows [90° radius elbows, Type 5090] in SolidWorks
Открываем файл отводов [90° radius elbows, Type 5090] в SolidWorks
2. We start Routing Library Manager / Запускаем Routing Library Manager
3. The principle of adding this element is completely analogous to adding a pipe. Those your task is simply to press the button "Next"
Принцип добавления данного элемента полностью аналогичен добавлению трубы. Т.е. ваша задача просто нажимать кнопку "Next"


4. In the pop-up window, confirm the save. After saving, a window will appear asking you to add a component to the "Piping & Tubing database", and confirm.
В всплывающем окне подтверждаем сохранение. После сохранения появится окно с запросом о добавлении компонента в базу "Piping & Tubing database", так же подтверждаем.
-
Step 4: Route Pattern Setup/Настройка шаблона маршрута
- We start Routing Library Manager / Запускаем Routing Library Manager
2. Go to the tab "Route properties"/ Переходим на вкладку "Route properties"
3. Click on "Add new" [1] and in the field "Select Route Properties Template" [2] we indicate the name of the new pipeline, which will be displayed later in the selection of technical conditions.
Нажимаем на "Add new"[1] и в поле "Select Route Properties Template" [2] указываем название нового трубопровода, которое в последующем будет высвечиваться при выборе технических условий.

In paragraph [3] we need to select the pipe file added earlier in the "Piping and Tubing Database". Select the desired pipe in the table and click on the "Accept Component".
В пункте [3] нам необходимо выбрать файл трубы, добавленный ранее в "Piping and Tubing Database". Выбираем в таблице необходимую трубу и нажимаем на "Accept Component".

If your table is empty, you need to right-click in the area of this table and refresh it:
Если у Вас таблица пустая, то необходимо в области данной таблицы нажать правой кнопкой мыши и обновить её:

In clause [4], we need to select a branch file added earlier in the "Piping and Tubing Database". Select the required tap in the table and click on "Accept Component". The principle of adding a similar pipe.
В пункте [4] нам необходимо выбрать файл отвода, добавленный ранее в "Piping and Tubing Database". Выбираем в таблице необходимый отвод и нажимаем на "Accept Component". Принцип добавления аналогичный трубе.

4. After adding the elements, click "Save" and confirm the creation of a new pipeline.
После добавления элементов нажимаем "Save" и подтверждаем создание нового трубопровода.


5. When building a pipeline, it will now be possible to choose the type of pipeline:
При прокладывания трубопровода теперь будет возможность выбора типа трубопровода:

-
Step 5: The diameter of the copper pipeline/Диаметры медного трубопровода
These dimensions must be assigned to the connection points in the details that you will use with this pipeline base.:
Данные размеры должны быть присвоены точкам соединения в деталях, которые вы будете использовать с данной базой трубопровода.
6; 8; 10; 12; 15; 18; 22; 28; 35; 42; 54; 64; 76; 89; 108
