

How to ceate a part you can dimension while placing it in an inventor assembly

This is the method I use to create a parte which will get it's final dimensions when it is inserted in an assembly. This example will use a part with holes, the amount of holes is changed with the part size.
-
Step 1:
create jour part.

-
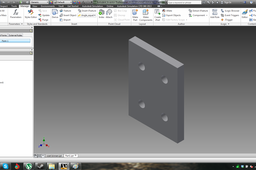
Step 2:
create two sets of holes.

-
Step 3:
Supress one of the sets of holes

-
Step 4:
Change dimension d0 into Width, this will be our variable dimension. To do this go to the "manage" tab and click on "Parameters"

-
Step 5:
Then go to the "manage" tab and click on "Add rule" then enter the same text as I did. This will result in:
When the width is less than 75 mm there will be 2 holes in the part, when the width is larger than 75 mm there will be 4 holes in your part.
-
Step 6:
Click on the little arrow under iLogic and Add form. Name your form.

-
Step 7:
Grab and pull the variable "Width"to the rigth window and click ok.

-
Step 8:
Test your Form. You can put as much variables into your rules and forms, but for this tutorial I kept it simple. Just enjoy.

